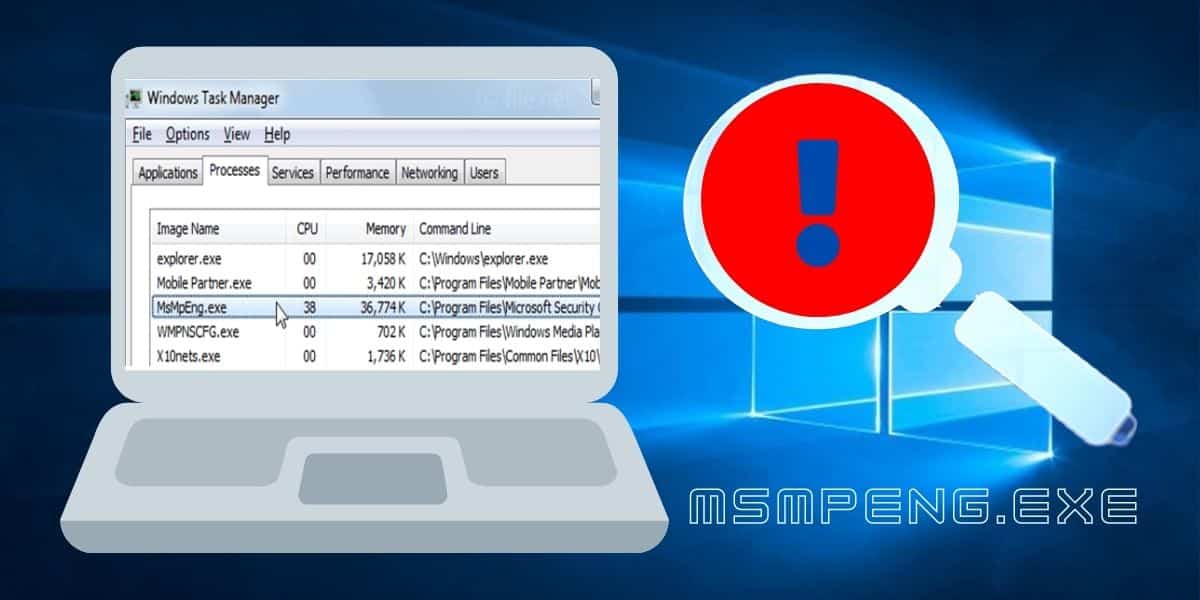
Microsoft Malware Protection Engine is a program that protects your computer from malicious software. It is the built-in antivirus that checks downloaded files for spyware and disinfects any questionable objects in Windows 10. It is also known as a Virus scanning service executable.
What is msmpeng.exe?
Anti-malware service, MsMpEng.exe is the core process of Windows Defender automatic protection service, included in the tool component of Microsoft Antispyware software.
The MsMpEng.exe program executes the Windows Antimalware Service Executable, which allows Windows Defender to continually monitor your computer for possible threats. The Antimalware Service Executable guarantees that Windows Defender delivers real-time virus protection, malware, and cyber-attacks when it is active.

MsMpEng.exe is a critical Windows Defender process. Its purpose is to examine file types for spyware and quarantine or discard any questionable objects. It also actively protects your PC from spyware attacks by scanning the computer for known malware and Trojans.
Can I delete it?
This process is the default program of Microsoft's security software MSE and Windows Defender. Cannot be closed, can only try to uninstall Microsoft security essentials to reduce its use. Generally, the memory occupied is between 20-100MB. It has been confirmed that msmpeng.exe will gradually reduce the memory occupied as the system runs, so you don't have to worry about it.
Msmpeng.exe may cause problems such as high CPU usage and hard disk ejection. You can fix it by the following methods.
1. Perform a security scan
When the msmpeng.exe CPU usage rate is too high, it means that it may be running and a virus has been found. At this time, first, use Windows defender for a comprehensive check.
Use Windows Defender for a full scan
Step 1: In Windows 10, click Start.
Step 2: To access Windows Security, perform a search and select the top result.
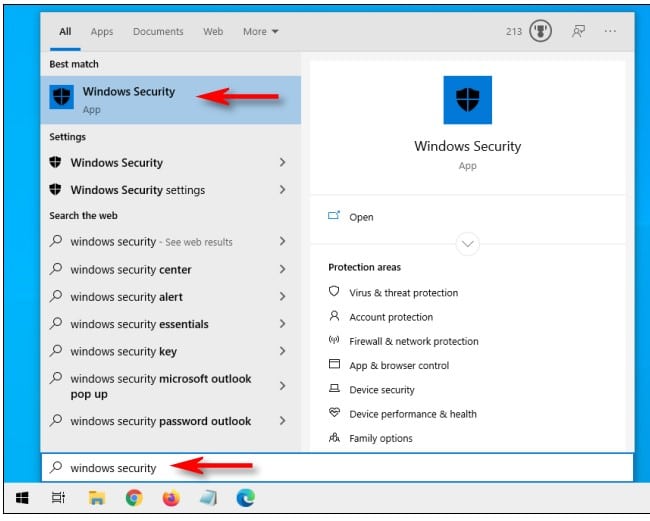
Step 3: Virus and threat protection should be selected next.
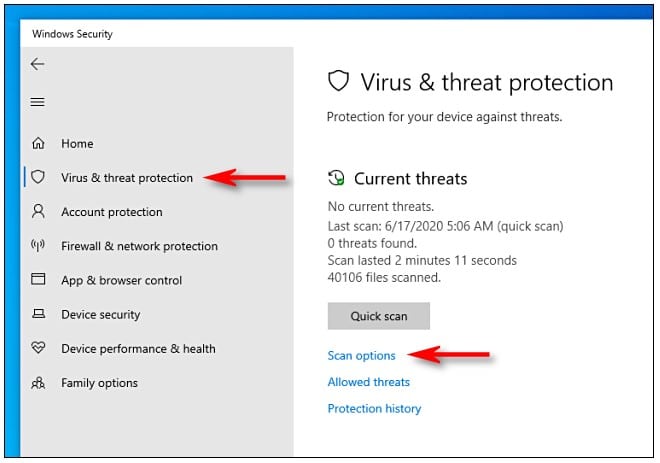
Step 4: Select Scan options from the “Current threats” menu.
Step 5: To scan the overall system for viruses and other malware, select the Full scan option.
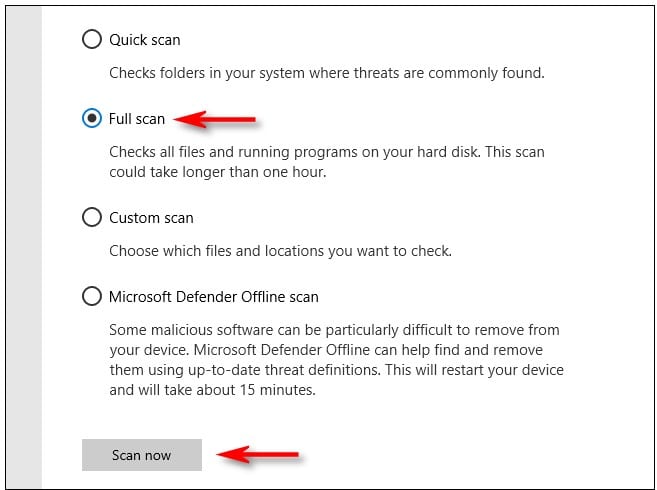
Step 6: Select the scan now option
2. Change Windows defender plan settings
Many Windows users who report significant CPU utilization by MsMpEng.exe indicate it happens during a comprehensive system scan. To resolve these difficulties, reschedule the scan for when you are not operating your pc:
Step 1: Enter Task Scheduler in the Windows search box.
Step 2: Navigate to the Task Scheduler screen's left pane and double-click on Task Scheduler Library.
Step 3: Navigate to the path below: Library/Microsoft/Windows/Windows Defender and expand the folders.
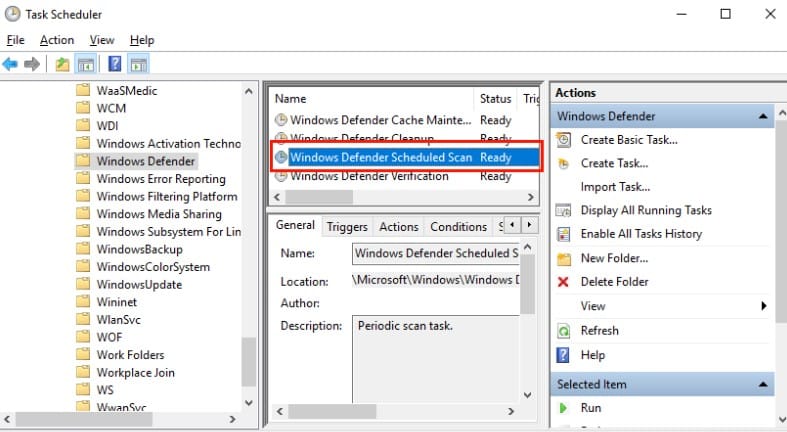
Step 4: Identify Windows Defender Scheduled Scan in the center pane of the Windows Defender folder and double-click it.
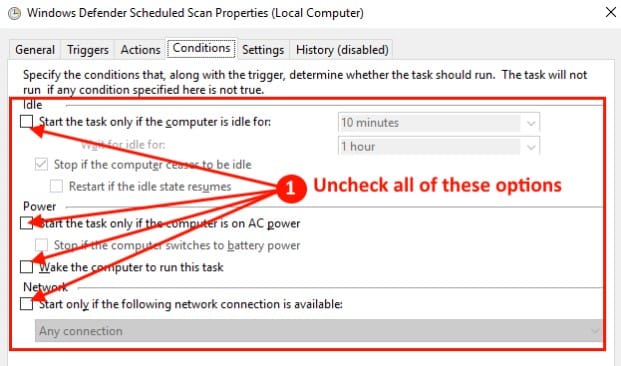
Step 5: Go to the Conditions tab in the new Window and uncheck all items before clicking OK. This will clear your computer's scheduled scans.
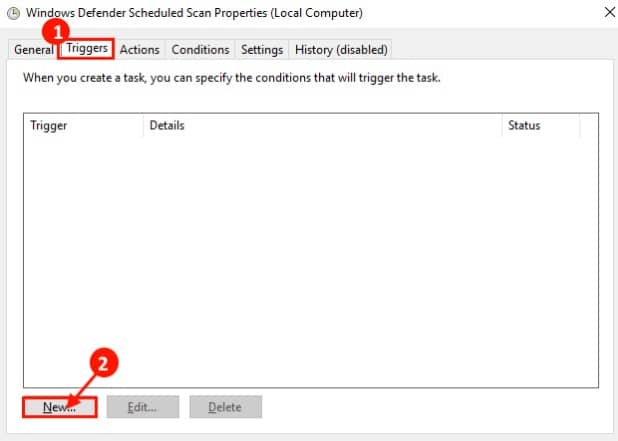
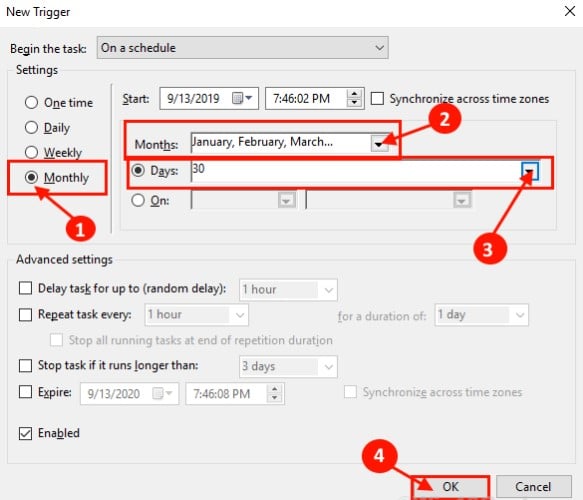
Step 6: Reset the Windows Defender scan schedule.
3. Disable Windows defender
Windows defenders can call the software of the msmpeng.exe process, closing defenders can reduce the use of msmpeng. But if you insist on doing this, it is recommended to install the three-party antivirus software first.
Here is a step by step description in the task scheduler to help disable the windows defender
Using the registry editor, deactivate Windows Defender:
Step 1: To launch the Run dialog box, press Wins Key + R.

Step 2: To open the Registry Editor, type Regedit and then OK.
Step 3: To travel to the following path, look in the left navigation pane and double-click the folders:
Microsoft Windows Defender, HKEY LOCAL MACHINESOFTWAREPolicies
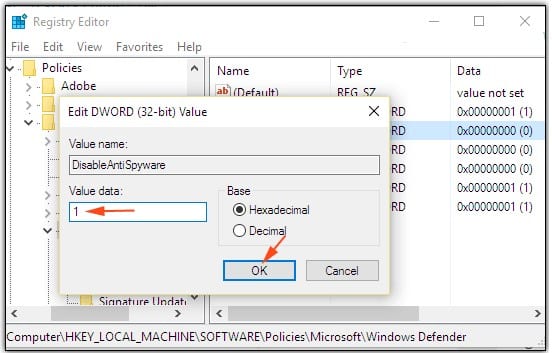
Step 4: Locate the Disable Antispyware registry entry, double-click it, and change its value data to 1.
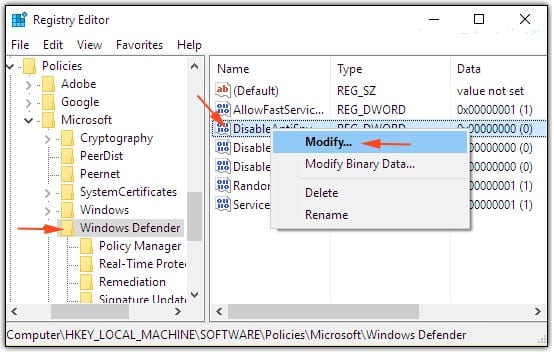
Step 5: Return to the main Registry Editor Pane and right-click on Disable Antispyware > New > DWORD (32 bit) Value if it does not already exist.
Step 6: Now, give the new registry item the name Disable Antispyware, double-click it, and change the value data to 1.
4. Uninstall MSE
Sometimes MSE and windows defender may be present after upgrading your windows. Since they both have the same role, it would be best to uninstall one. Here's how to fix the problem with Microsoft Security Essentials not being deleted before upgrading to Windows 10 and then being left with it running thereafter.
Step-by-step description
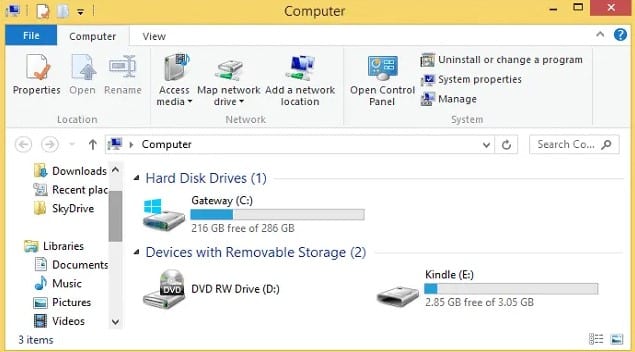
Step 1: Launch File Explorer
Step 2: Go to C:/Program Files Microsoft Security Client/ and double-click it.
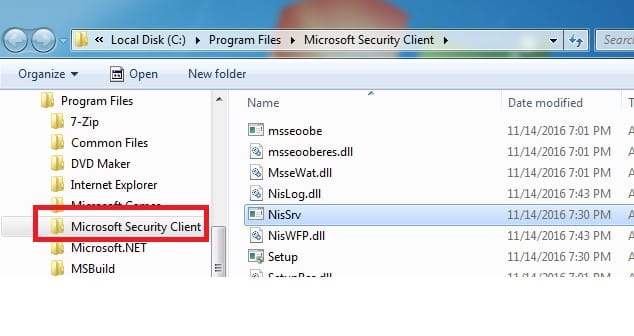
Step 3: Locate the file Setup.exe and choose Properties from the context menu.
Step 4: Select the Compatibility option.
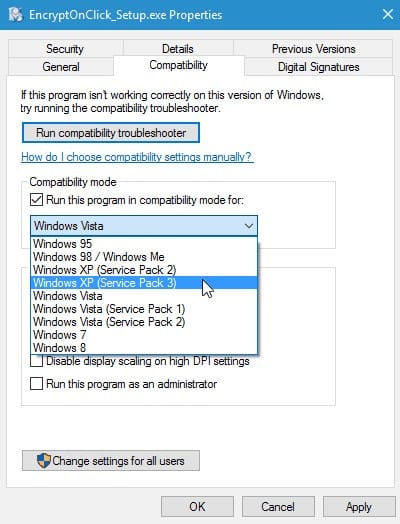
Step 5: Click ‘Change Settings for All Users at the bottom of the pane.
Step 6: On the following page, select Windows 7 in the ‘run this software in compatibility mode for:' box.
Step 7: Click OK
Step 8: Type cmd.exe into the taskbar search box, then right-click and select ‘Run as Administrator.' This will open a command prompt with Administrator privileges.
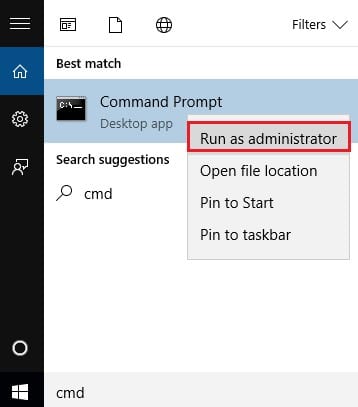
Step 9: write the following into the command prompt window:
C:\Program Files\Microsoft Security Client\setup.exe /x /disableoslimit
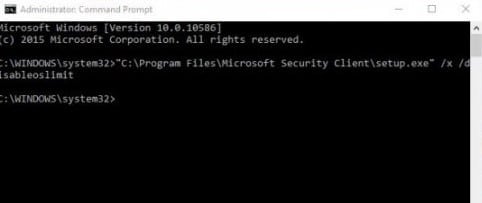
Step 10: Select Uninstall.
After rebooting, Microsoft Security Essentials should be removed and Windows Defender function properly
Conclusion
Windows Defender is a valuable tool, especially because it is included with your Windows operating system. However, it may cause your computer's CPU to overwork. If you properly follow the procedures outlined in this article, you will be able to take control of your PC's Antimalware Service Executable and keep it working at full speed.


